Showing posts with label Sewing. Show all posts

Sunday, June 7, 2015

SAAS: Sewing at Any Size: Copycat Your Clothes


This is my series on Sewing at Any Size, or making basic wardrobe items to fit any body.  Please feel free to print/save for personal use.  You can find other patterns and instructions HERE.  


I searched everywhere for a wedding dress for my own wedding in 2014.  It was a casual summer beach wedding, so I wanted something simple, lightweight, and in natural materials.  What I ended up doing was making my own.  And since I had a beloved cotton dress that fit me well but was getting a little shabby, it was perfect for a pattern.  Now I can make that dress in any fabric and color I choose, including white linen.

Whether it’s a beloved old dress with a stain, or that perfect clearance skirt in a hideous color, sometimes the best way to get exactly what you want is to make it yourself.  Reverse-engineering your clothes lets you learn to sew clothes that fit you quickly and easily without having to buy or decipher a sewing pattern.  

You Will Need
  • A piece of clothing you want to make a copy of.  (Note: you will not be able to re-assemble it once it is marked up as a pattern, so make sure you’re ready to give it up)
  • Fabric of a similar weight and stretch to the original. Take the garment to a fabric shop for advice on how much you’ll need, and for advice on pre-shrinking the fabric you’ve chosen.
  • Pins
  • Sewing scissors or cutting tool with mat
  • Seam-ripping tool or small scissors
  • Sewing machine or needle
  • All-purpose thread, for most fabrics
  • Permanent marker
  • Fray-Check liquid, masking tape, craft glue, or other means of stopping the fabric from fraying

Dismantle and Document

It is very important to take pictures and make notes at each step, so that you know how to re-assemble the garment.  Use a marker to make notes on the piece itself, or number them for reference on an instruction sheet.  

Take apart every piece, including the hems.  If the edges aren’t finished somehow to keep them from fraying, you can use Fray-Check, masking tape, or craft glue along the edges.

When it comes to little pieces, make sure to number them and make note of where they go on the finished piece.  Also note how each seam was put together. 

Darts are folds sewn into the fabric to help fit.  Take darts apart, but use a marker to draw a dotted line where the stitches were, so that you can re-create them on the new piece.  

Pin and Cut

Pin each piece onto the new fabric, and then carefully cut out around the edges to make copies.  Leave the pieces pinned together until you’re ready to add them, to keep them from getting mixed up. 

Assemble and Sew

Using your notes and pictures, assemble the copy using the same type and width seam as the original for each piece.  In order, sew darts, main seams, sleeves, button strips or belts, and then hems. Take additional notes, and then store the pieces and notes together for future copies.

Advanced

Simpler garments are very easy to copy, and you should make your first projects simple before trying to copy something complicated.  

To make a lining, you should be able to use the same pattern pieces as the main garment, and then put the lining together "inside out" or with the seams showing when it is assembled.    Put the lining and shell pieces together with seams touching, and then sew the hems and cuffs to connect them. 

Stretch and non-stretch fabrics behave differently, so you may find that a dress that fits you beautifully in a stretch fabric is too small in a non-stretch.  Thicker fabric also results in a smaller fitting garment.  Depending on your starting pieces, you may need to make up a test garment in cheaper fabric similar to what you want to use in your final piece.  I find, for example, that bedsheets from the thrift store make a great fabric for testing out patterns I want to make in cotton or lightweight linen.  Use a non-woven blanket to test out coat patterns. 

Thursday, December 13, 2012

SAAS (Sewing at Any Size) Fatkini Season Bandeau Top

You can find many more simple sewing projects by clicking the sewing link at the side of my blog.  

 It's almost here...the frantic messages screaming from televisions and newstands about post-holiday "beach bodies." These next three months or so always strike me as the most actively body-shaming time of the year in our culture. So in response, I say celebrate your beach body! It is your body, as it is, right now. Because people of any size, shape, color, etc. deserve to get out in the sun and sand, or down by the pool, and bare some skin!

To that end, this is the second in my series on Fatkinis. This is a super-simple bandeau-style bikini top.  You can find instructions for a halter-style string top here. 

First, the measurements.

Measurement A is just above the breast. A good way to find this point is to look where your cleavage starts. Measure around the chest, under the armpits.

Measurement B is from under the breast, over the nipple, to above the breast where you measured for A.


You will need stretchy fabric, but if you have larger breasts you may want to look for something more supportive than standard swimsuit fabric. You can even recycle an old tee shirt, sweat shirt or yoga pants for this. If you use a thin, light-color fabric, get it wet and drape it over your hand in bright light. This will tell you how see-through it will be at the beach. You may have to sandwich several layers of lighter fabric to keep from flashing nips to the world.

Cut a long rectangle of fabric that is Measurement B plus 1" wide, and Measurement A long.

You will also need 2 lengths of string or ribbon approximately 12" long and 4 lengths 6" long. These can be a different material or you can make it from the same material by folding over a 1/2" wide strip, stitching on the long edge, and turn it inside out. Stitch or knot the ends.

Fold all four edges of the long rectangle over 1/4" and press or baste. Fold the edges over again 1/4" to hide the raw edge and use a stretch or zig-zag stitch to hem.

Fold the two short edges over 1" and stitch with a stretch stitch at the hemmed ends, creating a tube of fabric at each end.

Thread one of the 12" strings through each tube.


Tie a 6" string around the center of the top. This will go between your breasts. This is optional, if you want a solid tube-top style instead of a sweetheart top, you can leave this off. 


If you need additional support for the top, you can use a much longer string, knot it tight at the center as below, and then tie the ends behind your neck as a halter.

Tie the top on behind your back. On each side, mark the spot directly under your armpit. Take the top back off again, and knot one of the remaining two 6" strings at each armpit mark. 


Put the top on again and adjust the ties as needed. When they are in a good spot, make sure you tie them in a solid square knot. If they're in danger of coming undone or shifting, put a few stitches in to hold them in place. You can cut off dangling ends if needed at this point, and use stitches or glue to prevent fraying.

You now have a complete bandeau bikini top, so rock it whenever you please!

Monday, November 26, 2012

SAAS: Sewing at Any Size: Fatkini Season Part 1

This is my series on Sewing at Any Size, or making basic wardrobe items from scratch to fit any body.  Please feel free to print/save for personal use.  You can find other patterns and instructions HERE

It's almost FATKINI SEASON!

Yes we're already hearing about the "beach body" panic from ads and media trying to hock you the latest fad diet, surgery or gym membership.  Now here's the best part of body acceptance. Go to a full length mirror and take a look at yourself.  THAT is your beach body....right now...with no changes needed!  So if it was on some mental list somewhere you can go ahead and check it off and enjoy the holidays. 

Maybe you feel more comfortable covering up on the beach, but if you feel up to baring some skin then you should check out the fatkini threads on Tumblr. It started earlier this year, when Gabi Fresh put up a gallery with XOJane of fat bodies rocking their bikini swimsuits. It got a lot of media attention (some good, some bad) and inspired others with bodies of many sizes, shapes and color to post Tumblr pics sporting bikini. It is super-empowering to flip through the images. You can find a lot of submissions using just the Tumblr tagfatkini, but warning; some triggering items are mis-tagged (like weight loss and body-negative posts). 

So this summer, I have every intention of wearing a bikini in public, and screw anyone who has a problem with it!

While the XO Jane site has a list of places that sell plus-size bikinis, I thought I'd show how easy it is to sew your own so that you don't have to guess at the fit. These instructions are simple and will work for any size and shape body.

Today's project will be the string bikini top (all bottoms will be addressed in a separate post).

You will need a few measurements:

Measurement A: around your chest just beneath your breasts, where your bra band usually sits.
Measurement B: from beneath your breast to above it, over the nipple.
Measurement C: across your breast at the widest point (up and over like for measurement B)
Measurement D: from the top of your breast to the nape of your neck.

Here's a visual:

 You will generally need about a quarter to a half yard of fabric, but if you plan to make matching bottoms you may want to get a full yard. You can use almost any fabric with some stretch for this, down to and including an old tee shirt or pair of sweat pants you want to recycle. You want something that will dry well, and is somewhat chlorine resistant if you plan to be in the pool. If you use very thin, light color material you will want to do two layers unless you really want the world to see your nips.

Note: If you have one breast a different size than the other (whether due to nature or surgery) then just take measurements B and C for both breasts separately and keep track of which is which (Left and Right). If you plan to wear an insert or pad of some kind, measure to include it. If you wear a mastectomy or other prosthesis, you can make two layers and leave one side open as a “pocket” with a velcro closure. Message me if you need help with this. 

A Note on Knits

Swimsuit material and other light, super-stretch knits are notoriously difficult to deal with. It slides, stretches out of shape, and your sewing machine really wants to suck it down into the bobbin casing. You'll want to be careful when measuring and cutting to make sure the fabric isn't stretched or distorted. If you pull on it while measuring or cutting the end result will be off.

Since we're working with straight lines here, an easy way to set up the fabric is to use masking tape. When you measure, use 1/2” wide masking tape to outline the shape you want to cut. Place it so that you cut down the center of the tape. This not only helps keep the fabric from distorting when you cut, but it keeps it from unraveling and developing runs. Remove just before hemming. 

A sewing machine needle specifically for knits may help if your material is subject to runs, but is not necessary for heavier fabrics like tee-shirt fabric.  

When you sew, use your machine's stretch stitch settings (look in your manual). If you don't have a specific stretch stitch, use the zig-zag stitch. Use a thread of similar type as your fabric (cotton for cotton, synthetic for synthetic). Don't bother with the stretchy elastic thread unless you really know what you're doing. I tried it, and the hassle of finding just the right machine settings to keep it from shredding completely outweigh any extra stretch benefit. If you make it to fit your body, normal thread on a stretch stitch will be stretchy enough.

You will want to pick up some neutral-color tissue paper, like you use in gift bags, or wax paper. By placing this under the fabric as you sew and stitching through it, you keep the machine from sucking the fabric down into the bobbin case. It should come out afterwards with a hot water soak and tweezers. If you want to get fancy you can buy water-soluble stabilizer from a fabric or craft store. This saves you some tweezer plucking of paper scraps and simply dissolves in soap and water. I don't mind the extra work, and the tissue paper is cheap.

Making the String Fatkini Top

You will first need a piece that will tie around your chest under the breasts. You can use a ribbon, bias tape, or a piece of your swimsuit fabric for this. Cut it to measurement A plus 13 inches (for tying). Hem or otherwise secure the ends.

If you're making it out of fabric, cut a strip that is measurement A plus 13 inches long by 2 1/2” wide (you can make this wider or narrower as you'd like, but this produces a band about 1” wide). 

This gives you about 6 inches of end for tying in the back.  If you want a bigger, showier bow then add a few more inches.  

Fold the short ends over 1/4” and stitch the hem.

Fold the strip in half lengthwise with the wrong side of the fabric on the outside. Run a line of stretch stitches 1/4” from the raw edge down the length to make a tube.

Use a large safety pin or other tool to turn the tube inside-out so that the seams are on the inside. Stitch the ends closed. This is your chest band.

Now you are going to make the breast pieces. Draw two triangles of fabric where the base is Measurement C plus 2 inches wide and the height is Measurement B, plus 1.5”, plus the width of your chest band (1” if you made it as above).

 Start by making a 1/4” hem on all sides of each triangle.

Fold up the bottom edge to the width of your chest band. Sew across, but leave ends of the “pocket” open to thread the chest band through.

Fold down the tip of the triangle 1”. Sew across, leaving a pocket open on both ends. 
For the neck tie, you can again use any two ribbons or strings twice the length of Measurement D plus 12 inches, threading it through the open pocket at the top of each breast piece and tying it all behind your neck.

You can also use the same technique as you used with the chest band. Cut two strips of your fabric 1½ inches wide, and the length of Measurement D plus 12 inches. (note: this gives you 6 inches to tie a bow at the back of your neck. If you want a bigger bow then make it longer).

Hem the short ends, then with the fabric wrong-side out, fold it in half lengthwise and stitch along the long end. Turn the tube inside out and stitch the ends closed.

Thread the chest band through the bottom of each breast piece, and a neck tie through the top of each piece. You should get something like this:
If you don't like the double strings around the neck you can use a knot, bead, or bow just above the breast piece to bring them together and make them look like one piece. You could also alter the pattern, so that instead of the breast piece coming to a triangle point, it extends up and becomes the tie itself. This will be trickier to cut and hem, but it is entirely doable. You can also cut a single tie and sew it on at the top of the triangle (in which case you would not make a separate pocket at the top).
 So now you have a rockin' fatkini. You can go to town with adding ruffles, beads, fabric paint, etc. to make it your own. You can wear it with a tankini bottom piece, or wait for the instructions on bikini bottoms to make a matching set.


Friday, February 10, 2012

SAAS: Sewing At Every Size -- Circle Skirts

This is my SAAS (Sewing at Any Size) series on basic clothes that can be made for any size body without a commercial pattern. For other entries in the series, you can click on the Sewing topic in the sidebar category list.


As this may eventually become a book, please do not reprint or republish anywhere. You are welcome to copy/print/save for your own personal use.


The Circle Skirt

I have been slowly converting my wardrobe to a 1950's theme, with classic, tailored looks including the pencil skirt and the circle skirt.

The extreme example of a circle skirt is the Poodle, but they don't have to be that costumy.  I love the clean A-line swish of the classic cut, but knee-length can be adorable for summer. 


A circle skirt is right up there with the gored or pencil skirt for the easiest thing to make. 

But first, the math.

You need the following measurements:

Your waist circumference
The length you want your skirt to fall from the waist

Yeah...that's it.  But of course in an evil bait and switch, you also need the radius of your waist circumference (i.e. half the diameter of the circle).  For a "close enough" measure, you can divide your waist circumference by 6.28.  If you had geometry in school and want to be more precise, go to it.  Otherwise you can enter your waist circumference here to have the radius calculated for you.

Add the waist radius to the length you want your skirt.  If the total is less than 22 inches, you can buy standard-width fabric.  If the total is between 22 and 30 inches, you can buy 60 inch width fabric.  If your fabric has a pattern that must be a certain way "up", you'll need to use the more complicated cutting pattern below.  Remember that you'll be adding a waistband and hem, so you can fudge about 1.5 inches. 

If you wonder whether you can do this with your waist size, do up the math before you worry.  Remember that the radius of your waist is MUCH less than your waist size (circumference). For instance, if you have a 50 inch waist, you can still make a 50" long finished skirt with 60" fabric.  For every additional 6 inches around your waist, subtract about 1 inch from your maximum skirt length.

Simple Cutting Pattern

(For those who can work with the 45" and 60" methods.)

We'll call the waist radius plus length of skirt measurement (A).

Take a length of fabric TWICE (A) long.  Flatten it out and fold it in half lengthwise (i.e. bringing cut ends together) with right sides together.  Then fold it in half the other direction.  You should have 1/4 of the fabric with one corner containing a double fold and no raw edges.

We're drawing curves, so unless you're a pretty steady hand your best method is to create your own compass.  Use a nail, heavy weight, corner of a table, etc as one end.  Tie a piece of non-stretchy string around it at least long enough to stretch to measurement (A) plus several inches. 

Put the double-fold corner of your fabric against the point you tied the string.  From that corner, measure out the waist radius you obtain earlier.  Pull the string taut to that point, and hold a pencil or piece of chalk with the string.  As you move the chalk or pencil towards either edge of the fabric, the string will force it into a curve.  You should now have 1/4 of an even circle marked on the fabric. 

From the same corner, measure out (A), which should give you the length of the finished hem.  Using the same technique with the string and chalk or pencil, draw another curve at this distance.  When you're done, the mark should be the same length from the point along both edges of the fabric.

Now, without unfolding the fabric, cut along both curves.  When you unfold the fabric, you should have a doughnut shape. 

Complex Cutting Pattern

For those who are using a fabric with a pattern that must go in a certain direction.

Using craft paper, an old bedsheet, etc, trace a square that is measurement (A) on all four sides.

Follow the tracing and cutting directions above to create a single, 1/4 slice of the doughnut. 

Trace the slice onto the wrong side of your fabric four times, and cut out each slice.

Stitch the slices together to create your full doughnut. 


Finishing the Skirt

Add a waistband to the inside of the doughnut following directions in the post on a
gored/paneled skirt HERE

Once you have a waistband, try on the skirt.  Your body shape will affect the hemline, so note if it's too long.

If it falls just right, then make a narrow hem or use binding to finish the edge without changing length. 

If it's too long, mark the point where it needs to be trimmed to, leaving 1/2 inch for a hem.  Cut  to the mark (you may want to fold the skirt in 1/4's and re-do a smooth curve as before) and hem, or leave off the hem allowance and use binding to finish the edge (recommended for stretchy fabric).

Adding some Body

For the classic full, poodle look, add some petticoats underneath, or several slips.  You can make a very simple filler with cheap netting:

Take a length of elastic that fits your waist securely but not uncomfortably tight.  Knot or stitch the ends together to make a loop. 

Cut netting into 2" strips twice the length of your skirt.

Fold each strip in half.  Set the loop of the fold (a.k.a. the bight) under the elastic, then bring the tails over the elastic, through the loop, and tighten.  This is called a lark's head knot, and anyone who has done latch hook will recognize it. 


Pull the tails tight.  Continue tying strips in lark's head knots next to each other around the elastic loop.

If you do very short strips, this looks like a tutu.  If you do longer strips, it will fill out a circle skirt pretty nicely. 

If you want to get some twirling action with the circle skirt, you can get a more finished look by simply repeating the instructions on a silky fabric or tulle to make a second skirt.  The extra layer gives you some fill, and when it flares out you get a flash of color.

Thursday, July 28, 2011

SAAS: Business Clothes on a Budget

I'm adding this to my Sewing at Any Size series, even though there's not a whole lot of sewing necessary.  You can click on the "Sewing" link under Happiness Tools to your left for more projects like this one. 

There was a great post with some also great comments over at The Rotund on the challenges of work attire for us "death fat" women. Especially on a limited budget (i.e. can't afford custom tailoring). I started to write a comment, but it grew long enough that I thought it better to put it out as a post instead.

Unfortunately, I have accepted that as a tall, broad-shouldered, big waisted woman, the reality is that if I want something to look a certain way, I have to develop the skills to make it happen. Which means sewing. But you don't necessarily need a sewing machine to do some basic alterations on a budget.

Your first stop is Goodwill, Salvation Army, or other thrift stores. We said budget, right? These stores almost always have better choices in large men's clothes than women's, but the difference between the two isn't as wide as you think for business wear.

For altering the men's clothing we'll be doing some very basic tricks with elastic.

From the fabric/craft store (and some big box stores with craft sections) You'll need less than a yard each of:

1/4 inch wide elastic

elastic cord or narrow stretch lace (sometimes sold as pyjama or lingerie elastic)

and a yard or more (depending on your waist size) of 1/2 inch elastic.

You'll also need a sewing needle and thread. You might want to wait on buying the thread until after you've picked out your garments, because you'll want to match the color as closely as possible.

For shirt method 2, you'll want some light fabric ribbon or bias tape that either matches or coordinates with your shirt.

You'll need a quilting hoop, which is a large wooden hoop with a second hoop that fits inside it tightly. You place the fabric over the smaller hoop and push the larger hoop onto it, trapping the fabric between (there should be a screw to tighten it). You want one at least a foot and a half diameter, but preferably larger. Our local thrift stores ALWAYS have these for a dollar or two from people cleaning out their hobby room. Make sure they have the tightening screw and both hoops.

The next stop is the thrift shop.

You're looking for men's button-up shirts (short or long sleeve) and a men's suit coat in good condition. If you can find men's slacks that fit you and match the suit coat, bonus!

You should also hit the women's section and look for dresses, which look good under a suit coat for women in a business environment. If they don't have any that fit you, look for dresses of any size with the following criteria:

1. The fabric and color below the waist of the dress coordinate with the suit coat

2. the skirt of the dress flares below the waist

3. There is a point below the dress waist where the skirt will fit around your waist with enough fabric below that to reach your knees, plus two inches.

We'll be chopping off the bottom of the dress and turning it into a very simple elastic-waist skirt.

THE COAT


1. Find a men's suit coat that fits the widest part of your body (i.e. chest) and has some room at your natural waist. You should be able to pinch about 2-3 inches of fabric at the back. Much more than that and it will look odd. Sometimes a coat that's a single size too small can give you a "shrunken jacket" effect that looks feminine all by itself without any alterations. If not, try the steps below for a back gather.

2. Cut a six-inch piece of 1/4 inch elastic

3. Put the coat on inside out and have a friend help you pin the elastic to the fabric at the center of the back at the level of your natural waistline so that the elastic is at rest (not stretched) and enough fabric is gathered between the two ends that the coat looks fitted (but not too tight) from the front. Pin it securely at each end, leaving the middle loose (you may want to use big safety pins).

4. Stretch the fabric and elastic over the smaller half of the quilting hoop so that either the fabric or the elastic is taut. Push the larger hoop over the top, being careful that the fabric is even in all directions. Use the screw to tighten down.

5. On a sewing machine or by hand, sew zig-zag stitches (they look like the letter Z) across each end where you have it pinned.

6. Sew zig-zag stitches down the center of the elastic. If the fabric is loose under the elastic, gather it as you go so that it's puckered evenly down the elastic.

7. Remove the pins, remove the shirt from the frame.

The elastic should gather the coat at the back of your waist, giving the coat a more feminine sillouhuette. You can also use two pieces of elastic to make smaller gathers at the sides for a different look.

Advanced:

Women's jackets are generally shorter than men's. If you're ambitious and a shorter jacket is better for your body type, you should consider shortening the jacket and using darts to shape it. If the hem from shortening looks less than professional, a strip of contrasting satin ribbon or lace sewn along the edge will add a touch of style to the coat and hide mis-stitching.

If you don't like the look of the gather as is, you can mask it by adding a faux-belt for a very classical British look. Hem a piece of fabric to about 2 to 3 inches wide, with each end folded to a point. Secure it to either side of the gather with large flat buttons about the position of your kidneys.


THE SHIRT (METHOD 1):


I have despaired of finding a simple, business appropriate cotton button down shirt that fits me in any women's section of any store. They;re either full of "froofera" or they're cut very baggy casual.
The shirt can be gathered at the back with the same steps as outlined for the coat above. The thinner fabric will make a feminine sort of ruffle at the back, which is not at all a bad thing.

THE SHIRT (METHOD 2):


This is the tie-back version. Step 1 is the same as above.

2. Start with two pieces of ribbon or bias tape at least a foot long. You can finish the cut ends by knotting, taping, superglue or burning (if acrylic or nylon). For the end stitched onto the shirt you'll want to fold it under neatly.

3. Follow step 3 as above with the shirt right side out, but instead of elastic pin the end of one ribbon at each gather point.

4. Stitch the ribbon onto the shirt at the pin point.

5. Tie the ribbons to gather the shirt at the back and give it shape

You can also stitch the ribbon all the way around the shirt for a more decorative look. Start at the buttons and stitch it to the shirt all the way around until you reach the point where you would have pinned in step 3 (you can use chalk to mark this point).

THE SHIRT - EXTRAS

Another way to feminize the shirt is to change out the buttons to something more decorative. Few people will realize they're technically on the wrong side if they're pretty.

You can add a gather to short sleeves to make the outline more feminine. Using either elastic cord or stretch lace, sew it around the cuff of the sleeve (cord on the underside, lace either under or over). Stretch the elastic slightly and evenly as you sew so that it will hug your arm when it's finished.

Sew a strip of lace to the underside of the buttonhole side of the shirt so that it just peeks out 1/8th inch or so when the shirt is buttoned. It's a very subtle and simple touch. You can use fabric glue or iron-on fusible if you don't trust your stitching. You can continue the lace up along the inside of the collar for an additional touch.


THE SKIRT - SALVAGED


Click on the SAAS (Sewing at Any Size) tag or topic link to find my guide on how to make the easiest of all sewing projects: a gored skirt. You could use the same instructions and matching or coordinating fabric to make a variety of skirts to go with your jacket (pencil, A-line, straight line, etc.)

If you find a dress at the thrift store that doesn't quite fit, but the bottom would go well with your jacket, it's very easy to convert it.

1. Find the level of the skirt below the waistline where it fits around your waist with about 1/2 to 1 inch to spare. This is easy to do by just flipping the dress upside down and pulling the skirt up to your waist until it starts to tighten. If, at that point, you have enough skirt material to reach your knees plus about 2 inches, you have a potential skirt.

2. Cut the skirt off the dress at the point you found before.

3. Pull a piece of 1/2 inch wide elastic around your waist so that it fits snugly but not uncomfortably. Add 1/2 inch and cut the elastic to that length.

4. Fold the cut edge of the skirt over about 1 inch and hem it. Sewing is the best way to accomplish this, but you can certainly use fabric glue or iron-on fusible to do it; they just won't stand up as well to washing. Leave about 2 inches of it unhemmed for now.

5. Thread the elastic through the hem. I use a large safety pin to feed it through, pinning the other end to the fabric so it doesn't get lost.

6. Pull the two ends of elastic out to where you can work with them. Make sure the elastic hasn't twisted inside the hem. You should have a continuous flat loop. Overlap them and stitch very thoroughly so that they hold.

7. Tuck the elastic up into the hem and finish the last few inches of hemming by whatever method you chose.

8. Even out the fabric around the elastic.

Note that a medium to wide belt will easily cover the elastic waistline if you don't like the look of it with the shirt tucked in.


Also note that you can wash a wool suit coat, despite what you've been told.  Personally the idea of wearing a never-washed chemically cleaned used coat is icky.  I washed a thrift store wool tuxedo jacket by soaking it in a few tablespoons of Dawn dish detergent in room temperature water in the sink for a few hours, agitating gently every now and then.  I rinsed it well in the bathtub, rolled it in a towel to squeeze out excess water, and laid it flat to dry (hanging it will distort the fabric).  There wasn't any shrinkage and it really made the fabric look newer.  Make sure the water is room temperature and not warm or cold, and don't use the washing machine.  There may be the occasional coat where this still shrinks or damages it, so consider cost/reward when giving it a try.

Wednesday, December 15, 2010

Happiness is Using Up My Fabric

In the interest of retrenching on spending and decluttering, I'm pulling out my enormous fabric hoard and putting it to use! 

I think most sewers accumulate a hoard at one point or another.  Mine is the result of business ventures that went bust.  One year I was going to make quilted drum covers to sell at Renaissance fairs and Pagan festivals.  I bought fabric in bolts when I could find it cheap and the pattern was right.  When I let go of that idea, most of the fabric remained.  Ditto when I bought up several hundred dollars worth of brocade to make plus-size Kimonos to sell on E-bay.  Still sitting in totes in the attic.

That's a bad project habit of mine; I'm a planner.  I love to draw up intricate designs, price materials, buy materials, write out step-by-step what I'm going to do.....then it goes into a tote in the attic :-)

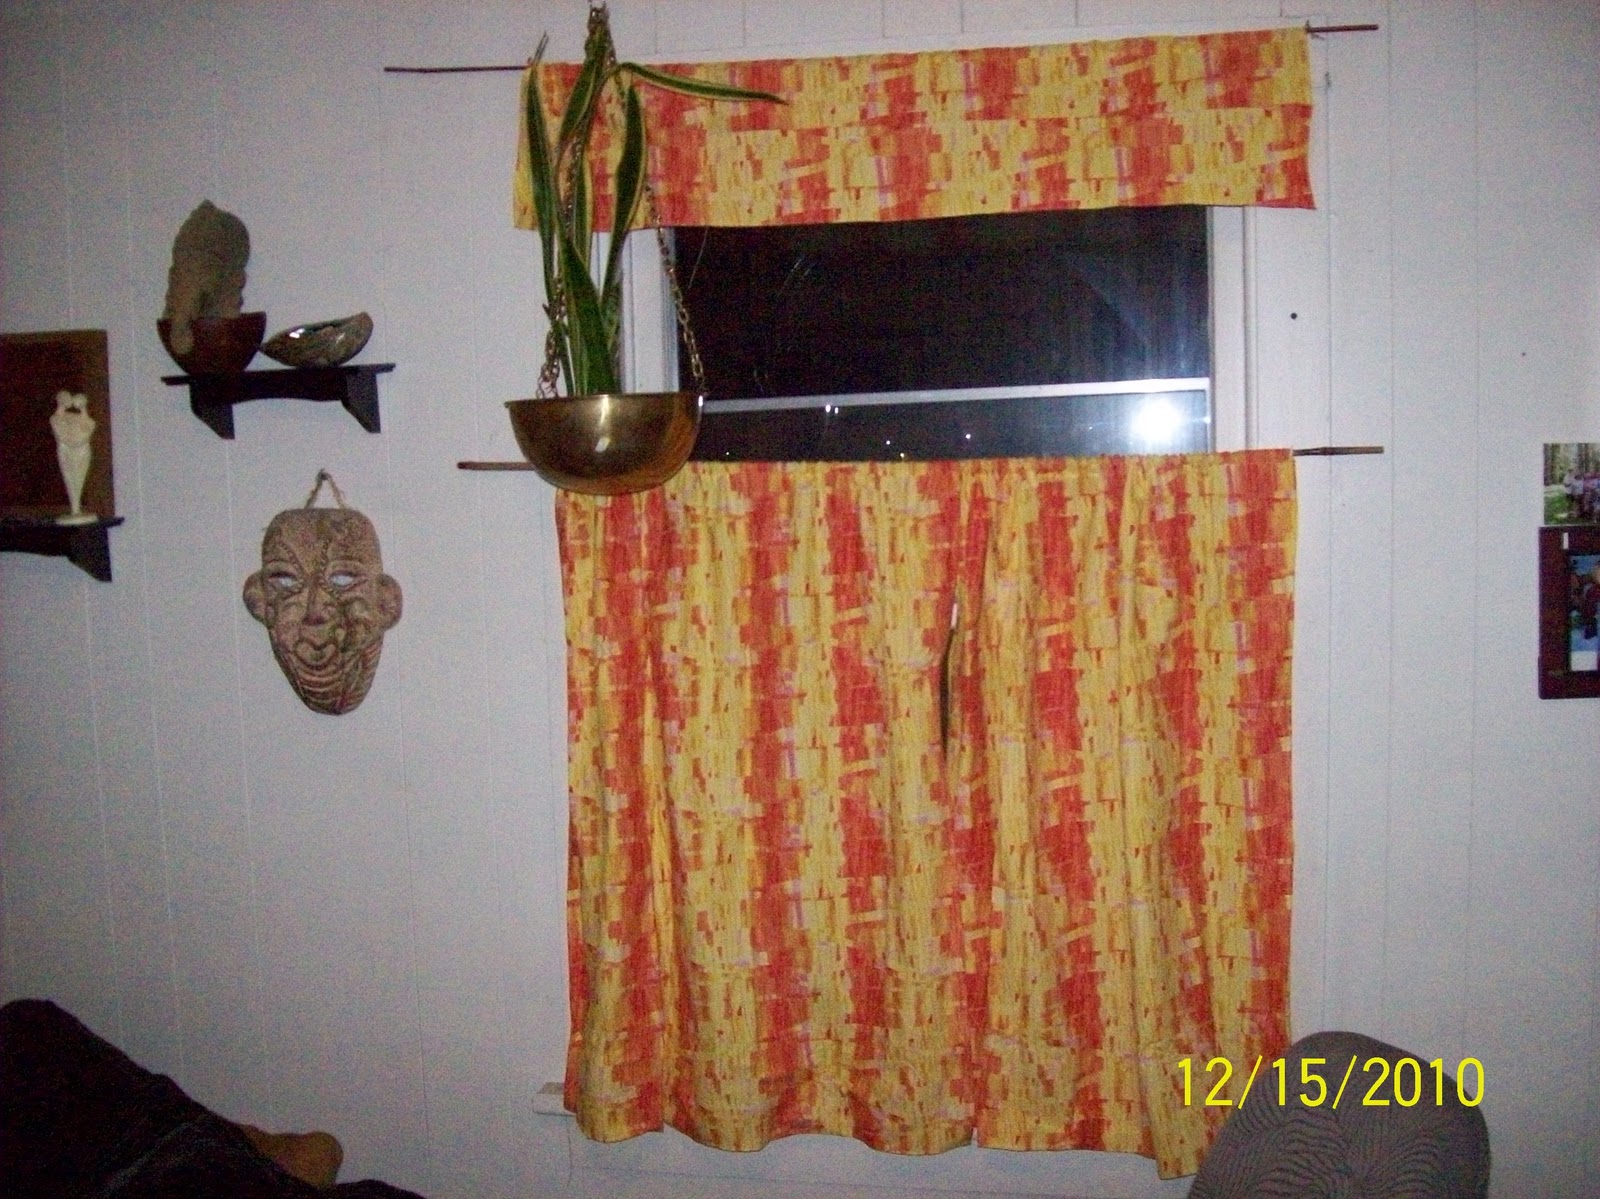
One project that's been sitting on the shelf is curtains.  We had very dark blue curtains that were disturbingly see-through at night when the lights were on in the house. We have a tiny house with bad lighting, so the dark curtains made it even smaller.  I've also been trying several ways to be able to keep plants without the cats either eating them or knocking them over.  So instead of waiting for money to buy fabric specifically for the project, I pulled out the bolts of quilting cotton once destined for drum covers. I made cafe' style curtains that give enough privacy, but let in plenty of light at the top.  I then hung plants from the ceiling where they could take advantage of the sun.  Between my fabric hoard and some bamboo sticks I'd bought to make a trellis (planned, priced, purchased, stuck in attic) I was able to make a major decorating change without spending an extra dime. 

The two yards of black pleather I found in a box made a rather hot and daring pencil skirt that I can't wait to wear to a party with my knee high boots.  I think I originally bought it for something punkish like the base for a skirt made of braided leather belts.  As for the brocade?  I have at least a few plans for dresses and jackets, but I may take at least some to make into a bodice for Ren-Faires.  Maybe even turn the rest into a nice luxurious quilt.  The point is that when inspired for a project, I need to look first to what I have before I decide I need to go out and buy more.

Tuesday, October 13, 2009

SAAS (Sewing for Any Size): Necktie Skirt for Pears

On my post about the super-retro-awesome necktie skirt yesterday, Alice asked a very good question that I didn't address in the original post:


"I'm really digging that skirt - got to check out the goodwill sale days again! One note - for those of us hippier than we are ... waistey? Bad word choice. For those of use whose hips are wider than our waists, we'd measure the widest part, then make the skirt to those specifications, yes? I'm figuring that there'll be some darting going on given my super-hourglassy shape - if you've got any suggestions on how to do that w/out creating really bulky sections or causing fraying, I'd be grateful!"


Now unfortunately since my sewing machine est kaput for now, the answer is going to involve guesswork on my part and your own experimentation!


Experimentation because the solution is really going to depend on your shape. Hips that are just barely wider are going to be easier to fit than super-hourglassy. Darting is going to be extremely tricky anyway because you're working with many layers of fabric. My machine bent a rod trying to shove the needle through a double layer of ties, so unless you have an industrial upholstery machine you may want to try and stick to single layers wherever possible. If you do stitch through more than one layer of full necktie, adjust your speed, stitch slowly to give the needle a chance to shove through, and use a very sharp needle.

One option to allow for darts is to remove the lining of the neckties from the hips up. By picking apart the stitches on the backside of each tie you can cut out the many layers of fusible and padding that allows it to keep it's shape. Leaving it in from the hips down will help the skirt maintain shape, but then you only have four layers of fabric to deal with when darting instead of four layers plus whatever gunk they stuffed the tie with.


Another option is to spread the ties at the hips and use insets. The tail end of the tie might be best for this since it'll keep the skirt from flaring awkwardly. The tops of the wide ends of the ties should meet where your waist is, then seperate to allow the insert of the narrow ends, like this:Remember that since there'll be some overlap where you're going through more than one layer of tie, you'll need to stitch those areas slowly, with a very sharp needle. If you're wondering why I keep repeating that, my answer is that I don't want to get sued when someone breaks a pack of needles and snaps a bobbin case trying to rush through this project :-). If your sewing machine allows you to adjust the force of the needle, lucky you!

You could also pull the lining from one or both layers to allow your machine to push through. Pulling the lining from the narrow inset ties will let the larger ones keep their shape and probably look better.

Another option would be to let the ties overlap from the hips up and gradually angle so that the overlap reduces on the way down. Again, either remove the lining or go slow and sharp! This might give the skirt the illusion of being pleated, but that's not necessarily a bad thing.
Remember that if you do this or the previous option you'll want to make sure that the back closure is a straight enough seam to add a zipper or other closure.
I hope one of those works for you! Sometimes I do get caught up in creating for my own shape, so please just ask if you want help adapting something.

Monday, October 12, 2009

SAAS (Sewing at Any Size): Necktie Skirt

Otherwise known as the super-fab punky necktie skirt that snagged me a few dozen awed and/or envious comments last weekend at a party. I've already had three requests for Christmas, but unfortunately this skirt put my sewing machine in critical condition before I could finish the waistband. I decided to wear it as-is by just folding the top over a belt, and luckily it held together long enough. It does mean, however, that my photo -assisted instructions give out about the point where you need to put a waistband on it :-)

Anyway, first the standard disclaimer:

Welcome to my Series on Sewing at Any Size. You can access the rest of the SAAS series by clicking on the topic link on the side bar.The series is a form of peaceful protest against the terrible, cheap, overpriced, ugly stuff that passes for plus size fashion these days. Anyone can make basic wardrobe elements to fit their body without trying to track down commercial patterns (a nightmare for anyone over a US size 24).As this may eventually become a book, please do not reprint or republish this anywhere else. You may, of course print for your own personal use!

Then for the photos! JD took them on our way to the party, but didn't get the fabulous oxford shoes with 4 inch heels:


What you need:

Neckties
Iron-On Hem Tape
Satin Blanket Binding
6"-9" Zipper, or 12 grommets, or ribbon for lacing
Sewing Machine
Black Thread
Scissors
Iron/Ironing Board


For neckties I visited the Salvation Army. They discount older items by 50% depending on the color of the tag. I went on a blue tag day and got all the blue tag neckties for 50 cents. I also got a bag of ties off my local freecycle list, which I plan to use in a skirt for the best friend.


To determine the number of neckties you need for the skirt, first decide on a length. I measured the length of an existing skirt I liked, adding an inch because the flare would make it more revealing than the fitted skirt I was measuring. I came up with 22".

The best part about a shorter skirt (i.e. under 25") is that generally you can use half the number of neckties by cutting them in half and using both ends.

Measure your waist where you want the waistline of the skirt to be. Make sure the tape is snug, but not constricting. We don't have any seams here, so you don't have to add anything. Mine is 55".

Count on each tie or half-tie to be 1" wide. Some will be more or less and you can measure as you go, but it's a good average. I started with 27 ties since I could use both ends. I didn't use them all, but that's what I used for planning purposes. If I had done a full length skirt I would have needed to look for 55 ties.

Subtract 2" from the length of the skirt, multiply that number by the number of ties and buy that much iron-on hem tape. This will be in the section of the store with the bias tape, rick-rack, etc. It comes in 3 yard packages normally, for about $2.00 US. I needed 19" by 25 ties, or 475 inches of hem tape. There are 36 inches in a yard, so I needed 13.5 yards, or 5 packages.

I recommend satin blanket binding for the waistband because it’s easy and looks good. You could just as easily make your own binding out of any material simply by folding the sides of a strip of fabric in towards the middle, then folding it in half so that the raw edges are hidden. You need a length of binding equal to your waist measurement plus 1/2".

Start by cutting the neckties to the length you want the skirt, as they'll be much easier to work with if you're handling less material.

Decide what order you want the pieces in and stack them accordingly so that it's easy to remember. I alternated narrow and wide ends and tried to keep similar patterns mixed evenly.

On the back side of the tie, match up the edges and the bottom corner where it narrows to a point. Make sure there's no gap between the sides; match them up evenly.

Lay a strip of iron on hem tape along the edge, overlapping the material of both neckties. Iron slowly on the hottest setting until the tape adheres. Some fabrics will melt under a hot iron. If you want to play it safe, cut a piece from a plain paper bag and keep it between the fabric and the iron.


Continue adding strips of necktie and attaching them with the hem tape until the length of the top edge of the skirt matches your waist measurement.

Flip it over and check for gaps. Sometimes the gap can be fixed by just adjusting the fabric of the tie, or sometimes you have to rip off the hem tape and try again with a new piece.

Leave the final line open so that you have one long flat piece that somewhat resembles a picket fence.

On the right side of the skirt (the side that will be visible when wearing) Use the zig-zag stitch on your machine to sew a line of stitches up each join, capturing the fabric of both ties in the stitches.

The finished seam will look like this:

When you have them all connected, the front should look like this (photo is of skirt folded in half, remember to leave one seam open for a zipper, etc.)

The backside will have the hem tape reinforcing the stitches, so it will look like this:

(Note: This is the point at which my sewing machine broke. Since I’m still waiting to do the finishing touches, I don’t have photos!)

Take the piece of satin blanket binding and place it so that the top edge of the neckties is tucked into the center crease of the binding. Fold each end of the binding 1/4" under the edge of the skirt so that the raw edge of the satin is on the backside (fold at red dotted line below). Iron to crease, using the piece of paper to keep from scorching the satin.
Stitch down the satin from the top corner at the short end, then along the bottom edge, then up at the corner at the other end (red dotted line below).


Bring the two open ends around to meet, and decide what kind of closure you want to use. The fabric is really too heavy for a traditional elastic waistband, but you do have some options.

If you’re like me and your butt/hips are equal to or smaller than your waistline, then the easiest option is to take a length of fairly firm elastic (the kind that will stretch in two directions) and stitch it along the underside of the seam instead of the iron-on hem tape. That should be just enough give to get it on and off, with just enough grip to keep it from falling. Obviously you should stitch it to the ties along the edge of each side, instead of overlapping the zig-zag stitches as before. You want it to give, but also for the two ties to lie flush against each other when the elastic is relaxed. Another option is to simply close the final seam, add some beltloops, and use another necktie as a belt to hold the skirt on.

Option 2 is a zipper. There are tons of great websites out there with step by step instructions on installing a zipper. Here’s a photo tutorial, for exampe. Connect the ties below the zipper with a strip of hem tape and zig-zag stitch the right side as you did the rest of the ties.

Option 3 is a lace-up closure.
First you need to add an extra panel so that the opening doesn’t gap. I’d suggest you take another necktie and actually open it up. Pull out any liner, then re-fold the tie so that it’s just two layers of fabric. Cut the tip off so that it is square, and attach it so that it only extends from just below the waistband to just above the first corner of the adjacent tie tips (red square below) Hem all the raw edges and attach it to one side only of the opening.
If you have metal grommets and a setting tool then you can set a series of grommets down each full size tie (not the panel) about 1” from the edge. When you lace it up with a ribbon, the extra tie panel will go under the other side to hide any gap.

If you don’t have metal grommets, you can do a series of buttonholes down each side for the same effect. If you sew the buttonholes with a thin wire, like florist wire, under the stitches (like the red line in the buttonhole below) it will reinforce the hole and allow it to hold up longer without tearing.

If you’re hesitant to venture into any of these techniques, you can always use 3” lengths of strong ribbon. Stitch both ends together onto the edges of the ties to create loops. Lace another length of ribbon or cord through the loops to close the skirt. You can also attach loops to one side and buttons to the other to create a button closure without needing to know how to sew an actual buttonhole. I’d suggest that if you use buttons that you turn the skirt so that they’re on the side or in the front. Trust me, they’re not comfy to sit on.

Wednesday, September 16, 2009

SAAS (Sewing at Any Size): The Madison, or Sizing up a Cardigan

This is my series on Sewing at Any Size, a protest against overpriced, badly constructed and badly-fitted clothing options available to anyone who isn’t shaped like a fit model.

You can see the rest of the SAAS series by clicking on the category link on the sidebar. As this will eventually become a book, please do not re-publish or re-post this material. Feel free to link to it however, or print/save for your own personal use.

I know I promised more underwear, but I haven't gotten near a sewing machine in months due to vacations, etc. Today I'm going on guesswork, since I can see how this would be constructed, but haven't actually done it.

I get clothing catalogs at work all the time; usually addressed to people who've retired or left. Often I flip through them and find outfit inspiration in ways I'm sure they never intended.
For instance, my first reaction to Chadwick's Madison Cardigan was along the lines of "eewww! Ruffles!" Sure it's available in Womens' sizes...the ugliest things always are.

But then I looked twice...at least long enough to see how it was constructed, and realized it's a great way to size up a cardigan or shirt that's just barely too small to button properly. Or, who knows? Maybe you like ruffles. Or maybe we can use the same idea, but in something less ruffly than chiffon.

First of all, click on the link. What you'll see is, first of all, a great visual example of my problem-solving post on lengthening sleeves that are too long, by adding fabric at the cuffs. All they did was roll a hem on a strip of chiffon (they used a serger of course, if you have one then lucky you!) then sewed it onto the existing sleeve cuff in two parallel rows of stiches. They left what looks like 1" of chiffon hanging over the hand, and 1" behind the stitches as a ruffle. In the graphic below, the white square is the chiffon, the grey is the original cardigan sleeve.
You could stitch the back edge of the chiffon strip (top red dotted line) to 1" above the cardigan cuff (where the 2nd red dotted line is in the graphic) so that you don't have the ruffle. You could also reverse the layers and stitch it with the cardigan as the top layer and the chiffon peeking out from underneath.

If you need the entire cardigan sized up and not just the sleeve length, or just like the look in the picture, take the following steps:

First make sure the edges of the front at least touch, even if it won't button. We'll be adding eyehook closures so that's where the finished cardigan will lie.

Remove buttons and stitch button holes shut. You don't need a lot of stitches; but the gap of the buttonhole will show through the chiffon.

Take a package of hook and eyes from the craft store. Use a needle and thread to attach the two loop on the hook half to the front of one side of the edge of the cardigan, facing out. Stitch the eye (loop) half to the other side of the front of the cardigan.


You'll want the hook to face out, if possible, unless you want to add a strip of protective fabric so that the hook doesn't rub on your skin.

Space the hook and eye sets however you'd like down the front of the cardigan.

Measure the neckhole (to the edges of the front closure), length and bottom hem of your cardigan. Add 1/2" to each measurement and cut a 4" wide strip of chiffon for each the collar and bottom hem measurements . Cut two 3" wide strips of the front length (there is only a ruffle on the outside of the front).

They show a continuous strip of fabric, and you're welcome to try that, but it's easier to explain how to do it with adding seams.

Start by hemming all three strips of fabric with as small a fold as possible, stitching as close to the edge as possible. If your sewing machine is a serger, use that instead.

Match up the halfway point of the neckhole strip with the center back of the collar. Pin so that 1" hangs over the top edge (look at the photo again if you need help visualizing.) Pin all the way around to the front. At the front, fold under any excess and crease so that the fold matches up exactly with the cardigan underneath.

Then cut the chiffon in a slanting 45 degree line from the top corner in the front to the edge of the strip (red dotted line)


Pin the front strip so that the crease of the hem (or overlock stitches) are matched up exactly with the front edge. You will be putting the fabric over the top of the hood and eye fixtures to hide them. Pin, then cut a diagonal line from that strip also, so that the two cut edges match up (same red dotted line above).

Unpin and sew the two cut edges together with a 1/4" seam allowance. Remember that the two pieces will be offset, as the collar piece has a ruffle overhang and the front does not. Follow the fold in the seam allowance when you get to the collar piece, so that the ruffle is hemmed. Re-pin, and it should look like this:Repeat the procedure for the bottom corner, leaving 1" of the chiffon overhanging the bottom hem of the cardigan. When you're satisfied with how the chiffon lies, stitch it on as close to the hems of the cardigan as possible. When you've finished, add another line of stitches 2" from the first.


The buttons they show on the Madison Cardigan are sparkly glass buttons, covered with the chiffon to mute the brightness. They're only decorative, so it's entirely your decision whether to leave them off or not.


To cover a button, cut a circle from the chiffon, stretch it tightly over the button and gather it at the back where the buttonhole or loop is located. Wrap thread around the bunched fabric to secure it and run a needle and thread through the center of the bunch for added strength.


Personally? I'd prefer to experiment with paints instead of buttons.

As an alternative to the Chiffon, you can use silk, polyester, lightweight leather, etc. I'd highly reccomend a strip of silk, but making it only 2" wide and leaving off the ruffle; simply stitch it onto the cardigan at both hems of the silk to secure. Using kimono-print poly silk (which is machine washable) and bamboo buttons would look great.


If you need to size up even further (but the armholes fit) sew a strip of fabric about the same color as the cardigan or chiffon to the hem and front of the cardigan. After you've extended the edge, continue as before, adjusting the width of the chiffon strips as needed to disguise this additional fabric.